Assignment 03: Laser cut a box with finger joints
List of content
Background
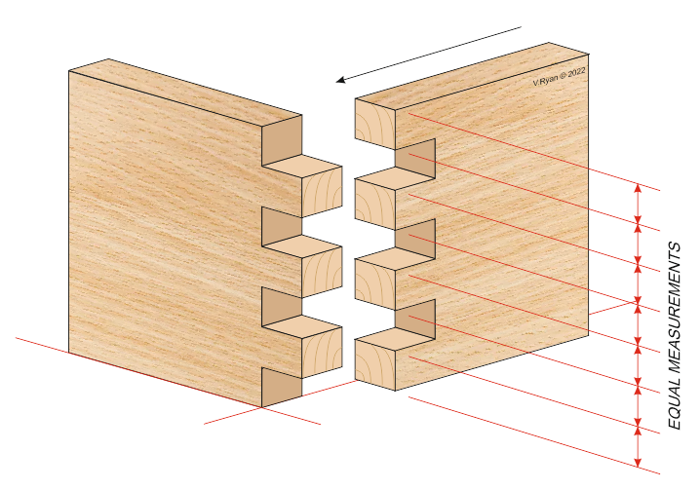
For this assignment we are going to learn about subtractive manufacturing. By using a lasercutter we can remove material in order to create 2-dimensional shapes with depth. Meaning that if we want to create 3-dimensional designs, we need to create shapes that are able to assemble into 3d shapes. For this we are going to create a box using finger joints.
Design process
My original idea was to use this box for a useless machine. But since there was a 100x100x100mm limitation on the design i decided to make a small cube instead. The idea was to design a singular piece, cut 6 of these, and then assemble them into a box. The result should be a sealed cube with sides 30*(3*2)mm^2.
First i made a 30x30mm square, this is the inside(volume) of the cube. Then i created the joints, the height of the joints should be the depth of the material being used for the cube, in my case i was hoping the wood is 3mm. The length of the joints is more complicated because the the keft the laser cutter creates. I asked how big the keft is, and the TA promises it is 0.025mm, so if thats incorrect i cant be blamed.
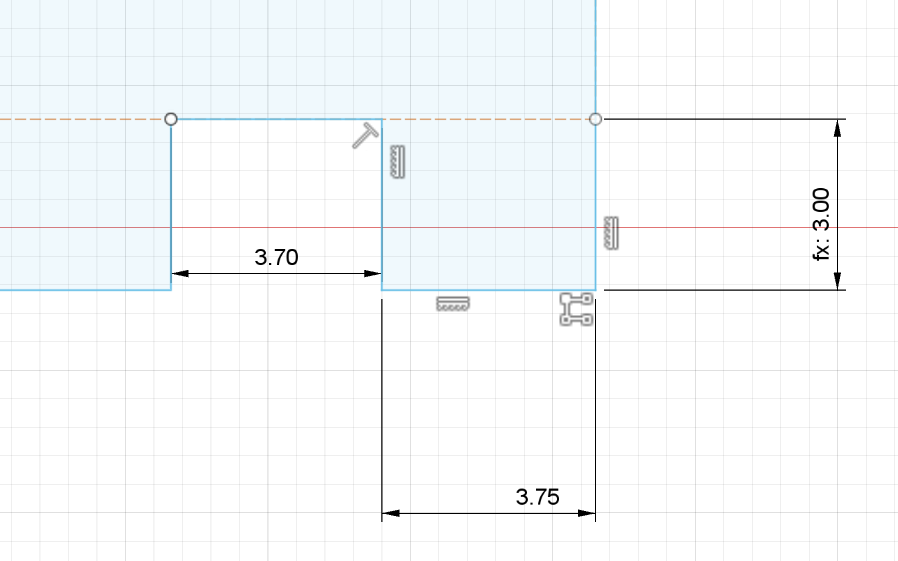
(3.75-3.70)/2 = 0.025
Joint lenght = 3.75mm
The laser cutter removes 0.025mm from both sides so if the joint intersections are 3.70mm just enough material should be removed in order to create a perfect fit.
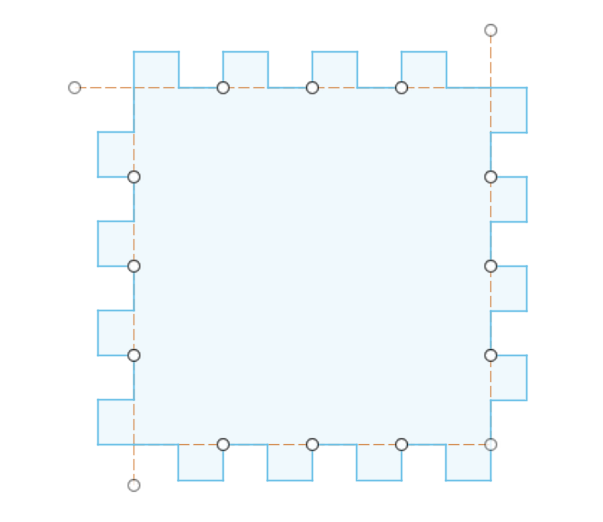
The end design looks like this. The design does not include the corners of the cube, but it should be completely sealed.
Result
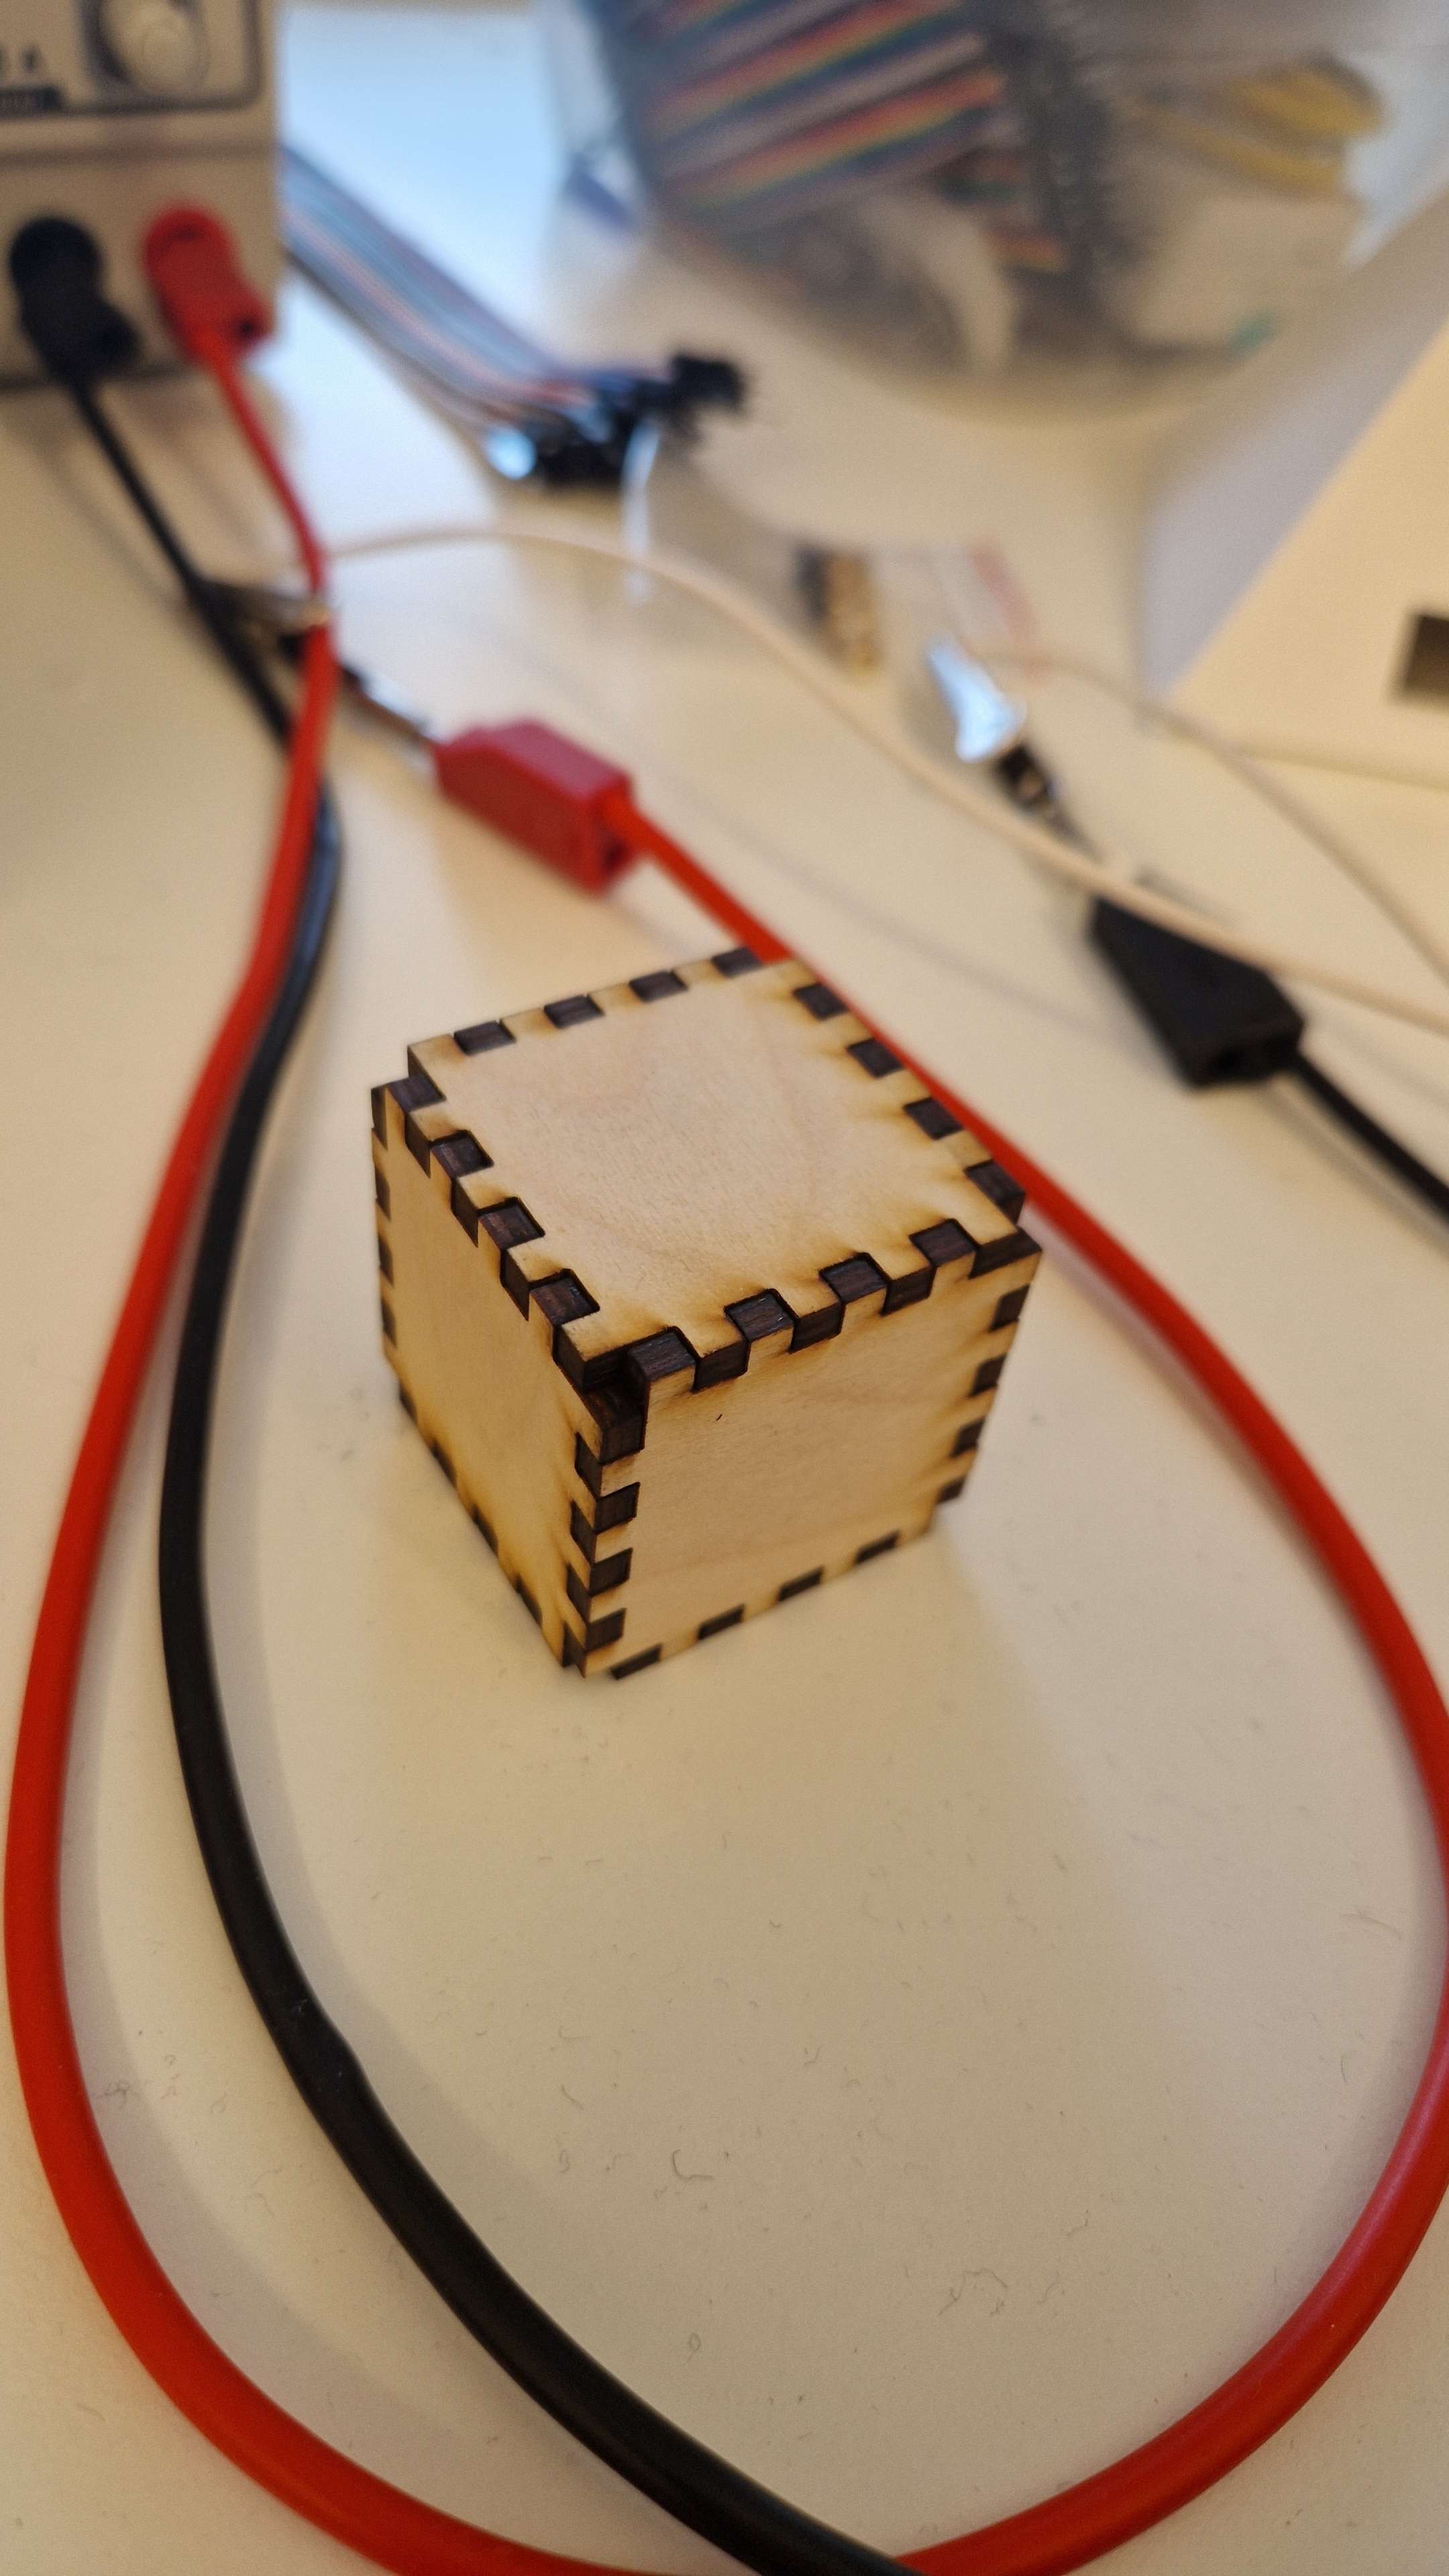
The TA in question reglected to mention that he discovered that the keft size accualy was 0.01mm and not 0.025mm. Even though i talked to him about the keft before designing the cube. He only mention the discovery after we tried to assemble the cube and found out that i desinged it with wrong keft size.